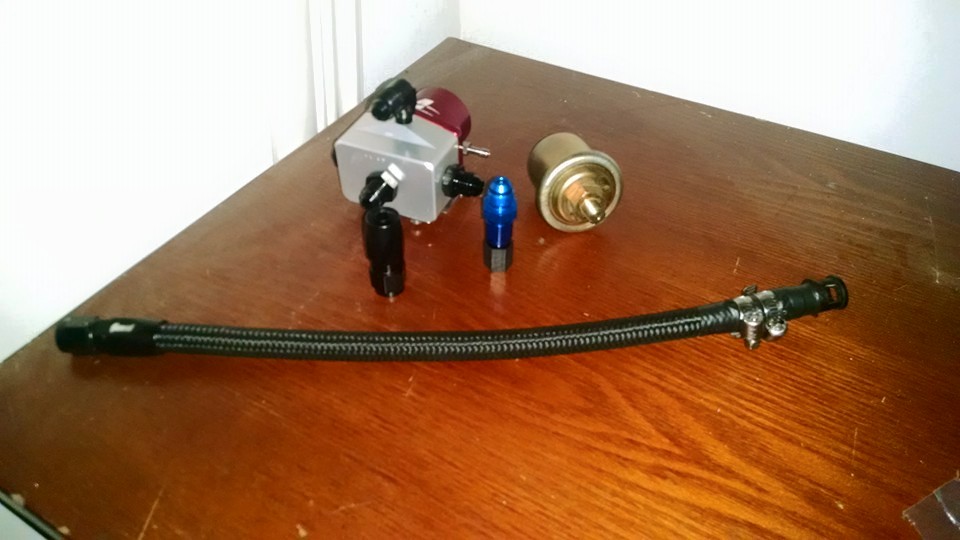
I decided to upgrade my engine bay fuel delivery system. below are the list of parts I used for my build

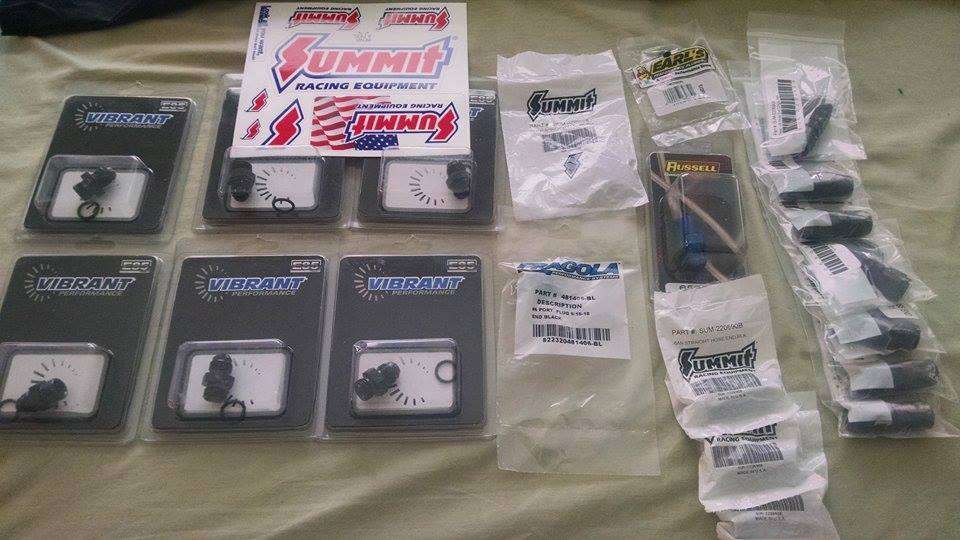
- 6′ Nylon braided SS lines
- Aeromotive external FPR
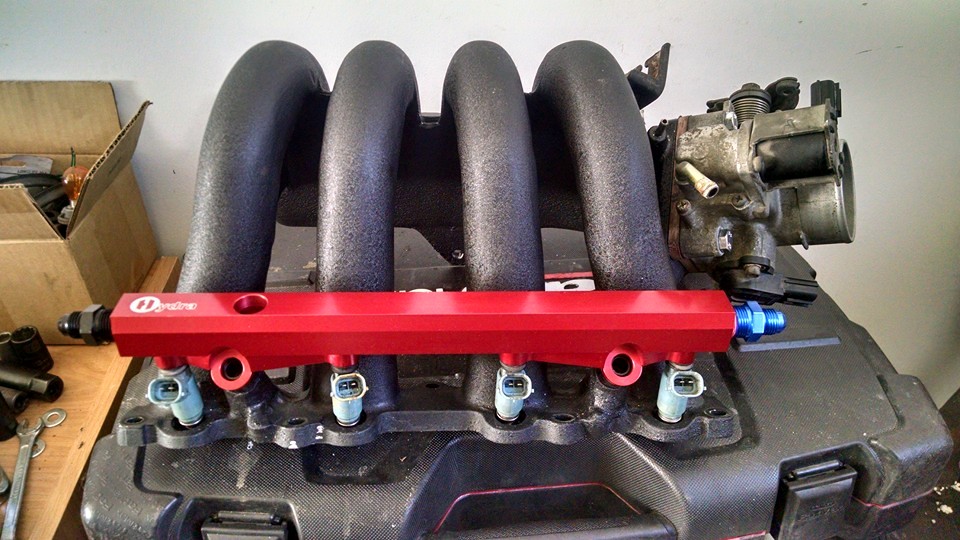
- Hydra Motorsports billet fuel rail
- 2 x 3/8 NPT to -6AN russles fittings
- 2 x -6AN o ring adapters
- 1 x -6AN o ring plug
- 1 x 3/8″ NPT plug
- Stock protege hardline connectors w/ 2 worm clamps
- 4 x -6AN summit racing straight fittings
- Speedhut Fuel pressure gauge + supplied hardware
Before anything I had to finish installing my new 01+ standard emissions(no valves) mazda 626 intake manifold with thermal spacers. The spacers are a major pain to hold and get the bolts lined up without an extra pair of hands. I’d suggest to use high temp copper gasket maker glue both gaskets to each side of the thermal spacer before attempting the install.
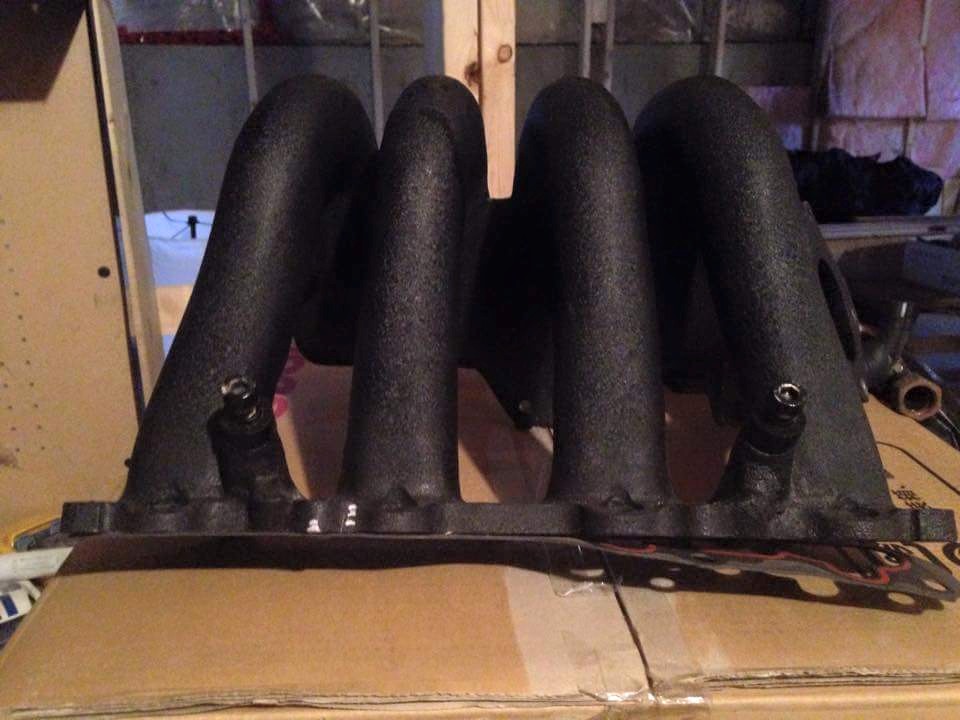
This will hold the gaskets in place while you insert the extended bolts through the IM.
Only challenging part I’d caution about is attempting to remove the head studs on the intake manifold side.
I just learned of this double nut trick and it really helped me with removing those head studs without damaging my engine.
After installing the IM, I started to measure and assemble the SS lines needed for my fuel feed and return. I created a total of 3 lines for my design.
I’ll be making some slight changes to the design in order to make the bay look cleaner by relocating my fuel pressure gauge sending unit to a remote location rather than on the external FPR itself.
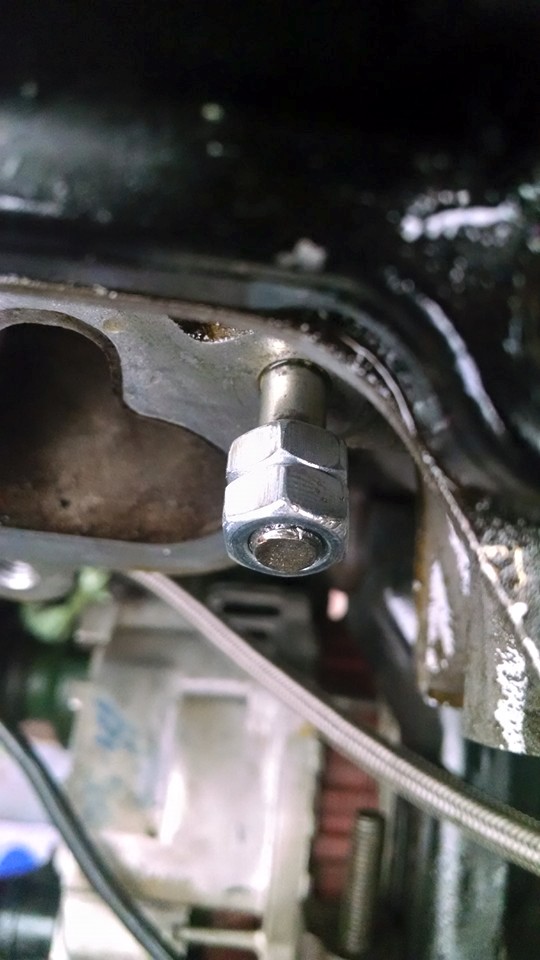
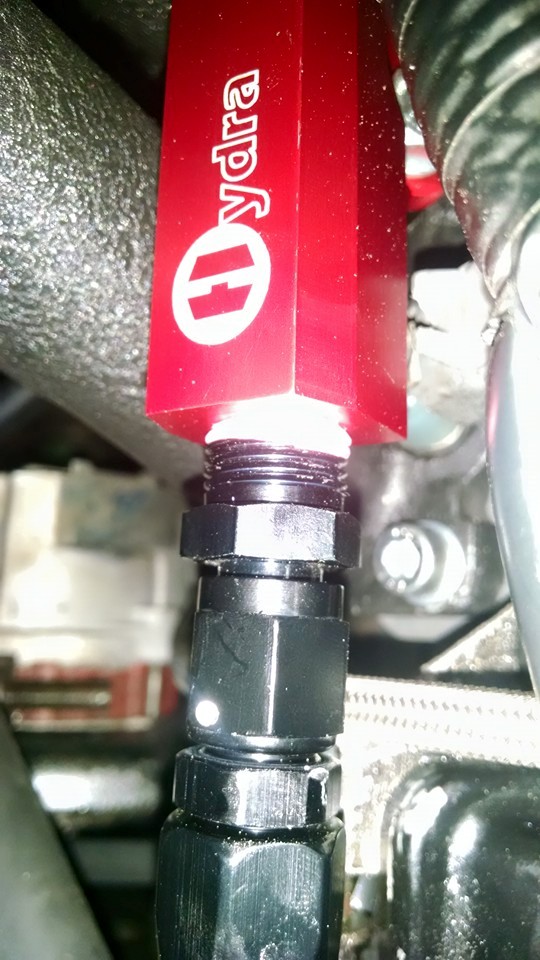
I researched alot about making the initial connection from the stock hardline to my AN line and figured this was the easiest route to follow. After a long conversation with our own MP5T I was able to figure out how our fuel lines are assembled by the factory. So how our hardline connections are designed by mazda is that it contains a plastic fitting, a plastic retaining clamp, and the rubber fuel hose is fitted and heat shrunken onto the plastic fitting itself.
So as an attempt to copy this design I cut my -6AN SS lines to size, fit the fitting in the line, wrapped it in etape and used two hose clamps to secure the connection. The stock fitting and -6AN hose go together perfectly and forms a very tight fit. Held without leaks at 60psi fuel pressure. I will need to continue to monitor it while tuning and under boost. Below is a picture of the feed/supply line I made.
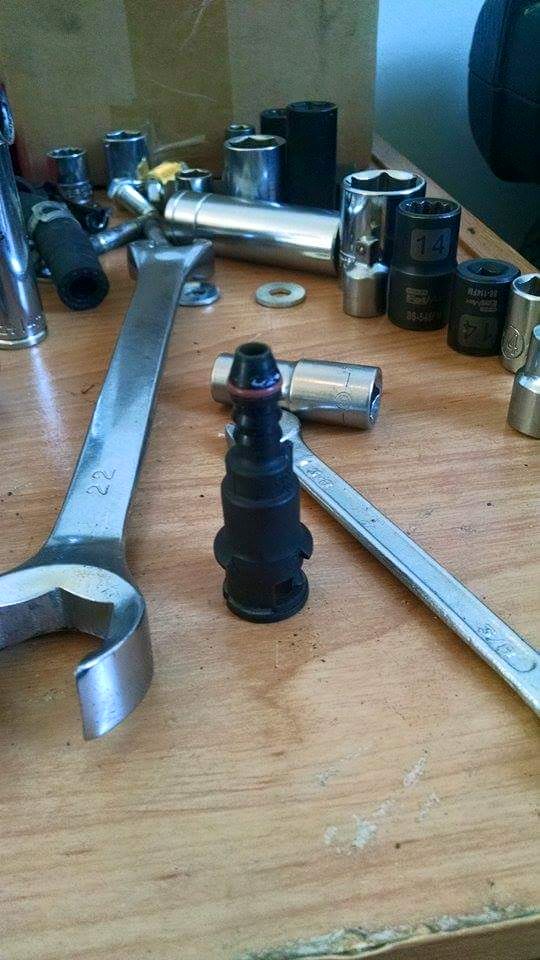
After making all the lines then its time to finally assemble the fuel system. Make sure you use a layer and a half teflon tape on each of the NPT threaded fittings and only cover a 1/4 of the fittings threads. NPT is designed to be a self sealing thread so not alot of teflon is required.
Vac Block Install
I decided to tap into the brake booster line and use it as my main source for vacuum pressure. Make sure you feel for the check-valve in the brake booster hose and only cut after it.
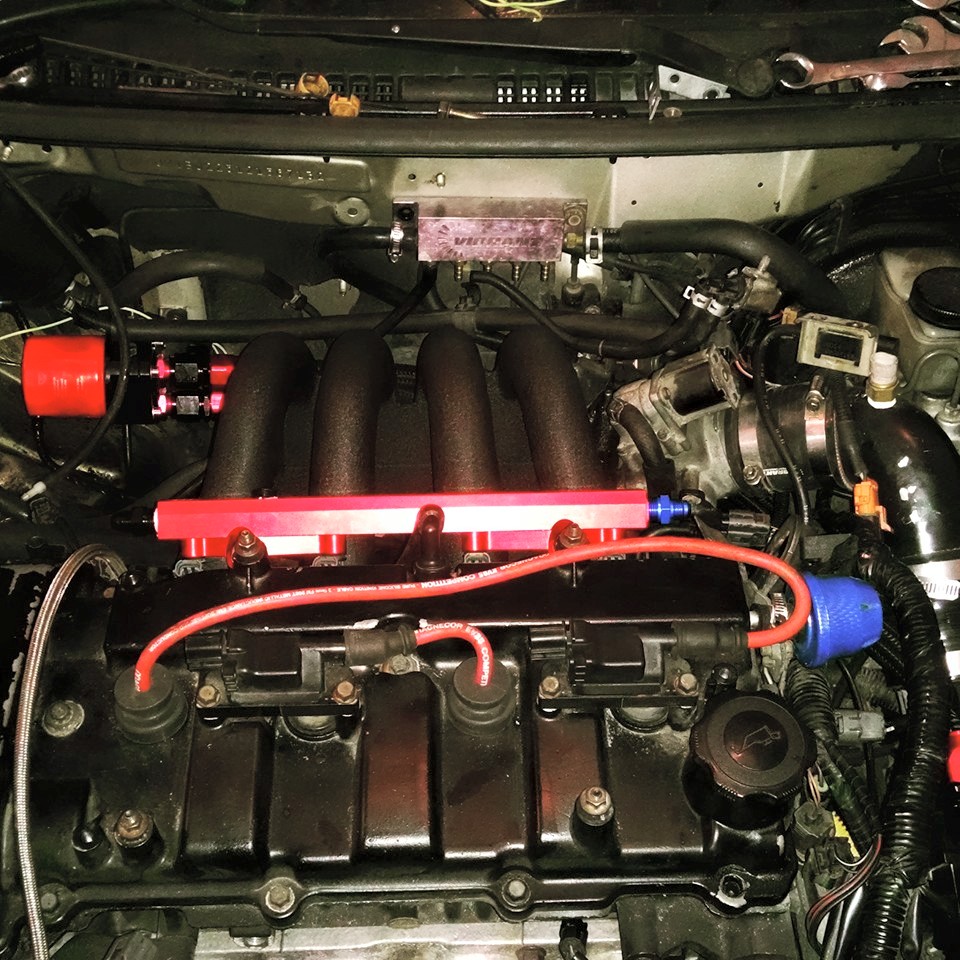
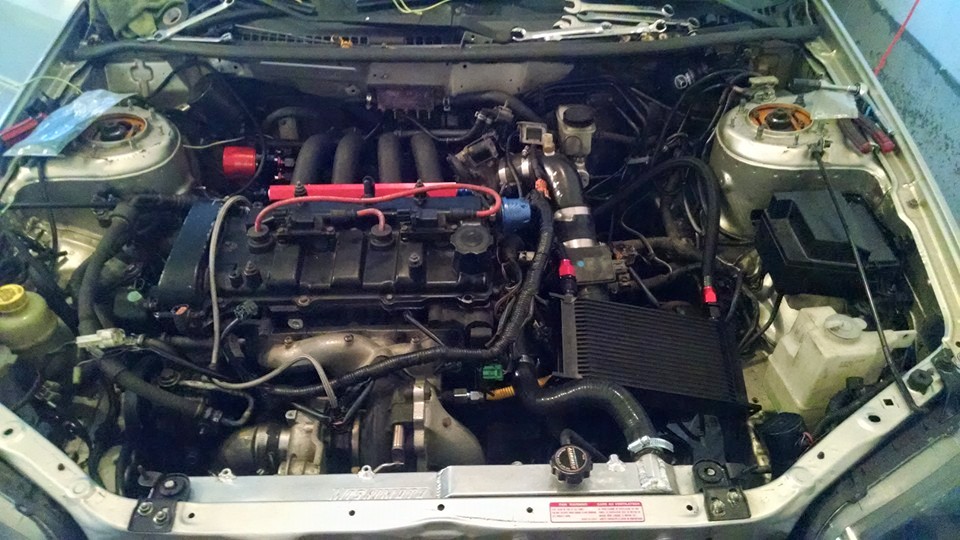
I decided dedicate a single 1/8″ npt port for my HKS bov, boost gauge, boost controller and the remaining two I used for my intake/TB vac ports. As my IM was ported, shaved and trimmed; a vac block was a must to complete this install. I ended up replacing all my vac hoses with new silicone hoses.
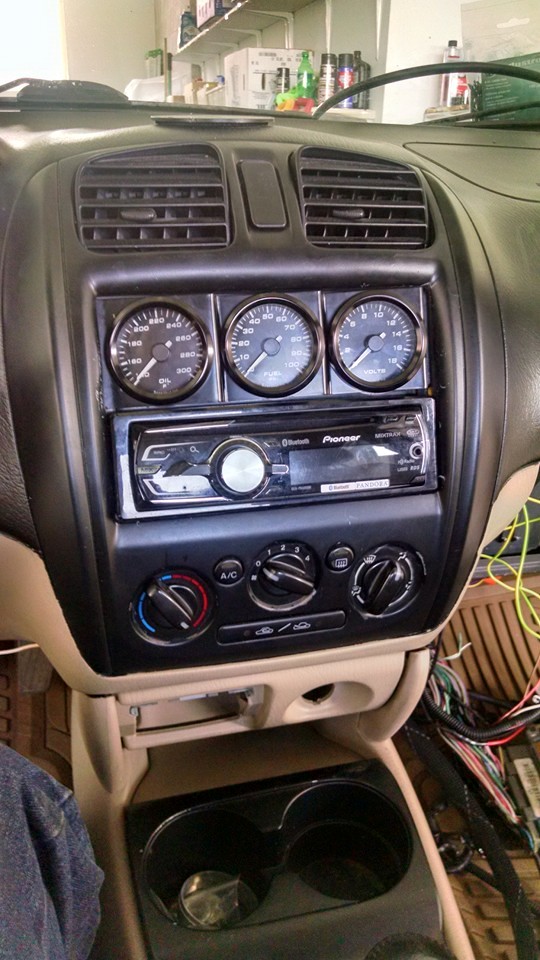
Speedhut Gauge install
I’m a strong supporter of speedhut gauges as they provide the best support, lifetime no hassle warranty, and a wide variety of customization options.
I bought a 52mm radio pocket gauge holder from ebay and installed my new fuel pressure, oil temp and volts gauges.
After installing these parts I was finally ready to test my build and TURN KEY! lol after doing a final check up I got around to starting the car yesterday. SHE STARTED and RPM shot from 500-6500 in 3 seconds LOL
I removed my intake elbow and noticed the TB flap was opened 1/4 way so the TB will need to be adjusted. The car will be dropped off to be painted and tuned later today 
Major thank you to Gswift (Gary), Hacker (Jay), MP5T (Brian), and The_big_dill (Phil) for helping me out with this build.
